Good morning crafty friends and welcome to a brand new challenge here at We Love 2 Create!! A big thank you to everyone who entered our last challenge, we'll be announcing the winners next week along with Top 3 honours so make sure you pop back!!
We're keeping it nice and easy for you and our theme is ...
Anything Mixed Media/Creative Goes
You don't have to use our products to play along but of course we love it when you do! As always we've got some lovely crafty goodies up for grabs for our lucky winner thanks to our generous sponsors Premium Craft Brands so don't miss out on your chance to win!!
The random winner and Top 3 for Challenge #20 will be announced next week, so check back to see if it's you!
As always our DT have been creating some mixed media magic, let's check out what they've been up to this week:
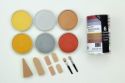
Nikky....I've been dying to do something funky with this image for ages but havent had chance to sit down properly with my Stampbord and PanPastels for a while. I transferred this digistamp onto my Stampbord using a laser print and Acetone (just print with a laser printer then rub acetone over the image to transfer it onto virtually any surface). I didnt get a brilliant outline but I quite like that as I then traced over the faint lines with a fineliner to outline them more.
You can WIN this little mini piece of art - just go to my blog and follow the instructions there...

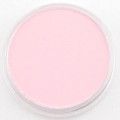
I then just coloured it up with various PanPastel colours, some went on dry, others I mixed up with a little water to paint on where I wanted a more vivid colour. I then scratched into the Stampbord to get some texture, scratched out the pink heart and some details as highlights and as we are all thinking of Paris this weekend, scratched out the word Peace as it just was the only thing that came to mind.
The background is made using a star texture stamp and versamark ink, it just holds the pastel so well, and I sprayed with hairspray in between layers to seal them and enable me to layer the colour up properly. Finally I edged the square with the Graph'It Glitter shake gold marker and added a few white dots using my Graph'It Shake white marker (best white in the world).
I used the following products on my make:
Stamp: Polkadoodles Oddella Fairy

 |  |  |
Yvonne - This was such a fabulous project to work on as there is layer upon layer, which I love. I started with a piece of watercolour card which had a pattern made with silver acrylic paint through a stencil. This was a leftover piece from another project but much too good to waste. I then used the same stencil, slightly offset, and popped through some light modelling paste. Once dry I coloured this with panpastels and was delighted to see that the acrylic paint still showed through! The background script was then added using modelling paste through a stencil, the depth is definitely building up nicely now! Once the script was dry I replaced the stencil and added the Coarse white Panpastel which gave it a lovely shimmering effect. The bits and bobs were then added, I did leave the centre quite open as all the layers were far too effective to cover up. I've popped a photo step by step on my blog if you'd like to take a look.

 |  | |  |  |
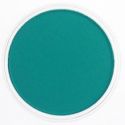
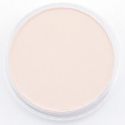
Claire C I've been colouring with my PanPastels this week, they blend so easily especially if you add the amazing colourless blender into the mix that they are perfect for colouring stamped images.

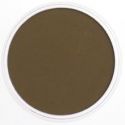
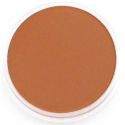
I find that Burnt Sienna Tint is a fab base skin colour and use Burnt Sienna and Raw Umber to add depth and shadows. Although these colours seem really dark I just use a little colour and then dip my Sofft tool in the colourless Blender and then they blend in easily. I coloured the image using Sofft tools, the teeny ones like eyeshadow applicators for the skin and one of the sponge bars for her hair.
The bar applicators are fab as they can add a broad sweep of colour or if you use the edge you can add very fine lines. Don't forget you can use a pencil eraser with your PanPastels. I used an eraser to lift colour to create the highlights in her hair, removing the brown PanPastel and then applied Hansa Yellow Tint over the top
The background was created with Turquoise and Bright yellow Green, blended and then overstamped with some background stamps. I framed her with a plastic frame from the poundshop that I painted with acrylic paints and then swiped with versamark and applied Light Gold PanPastel here and there before sealing with some matte medium
 |  | |  |  |
| |  |  |  |  |
 |  |  |

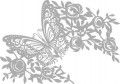
Terry: I have played with a canvas and made a wallhanger out of it. The first layer is Gesso, When the Gesso was dry I got the Light Modelling Paste with the Butterfly/Roses Stencil from Premium Art Brand and worked a bit on the background, the other half of my background was made with the Leaves stencil from Dutch Doobadoo. When everything was dry I was thinking about what colour I wanted to use. I really love the Metallic PanPastels, when applied and sprayed with water it gives such a very nice colour to the Roses. The leaves were colored the same way with the Lighter brown Metallic Colour. Everything was covered with the White Coarse PanPastel. The last layer on my background is Crackle, I love butterflies and was certainly going to use a lot of butterflies for this canvas. They were also colored with a waterpen and Metallic PanPastels. To seal the PanPastels I sprayed mixed Iridescent Paste with Water in my waterbottle. Last but not least I have placed a sentiment.

 |  |  | |  |
 |  |  |  |
I hope you're going to play along with our challenge, you have two weeks to enter and if your mojo is missing we'll be back next week with lots more inspiration from the DT and of course we'll be announcing the winner and Top 3 from our last challenge too.
Mister Linky's Magical Widgets -- Thumb-Linky widget will appear right here!
This preview will disappear when the widget is displayed on your site.
If this widget does not appear, click here to display it.
This preview will disappear when the widget is displayed on your site.
If this widget does not appear, click here to display it.
Gorgeous makes ladies . Tracy x
ReplyDeleteThis is my very first time here so excuse my ignorance. Does project need to involve Pan Pastels? The pieces by DT are brilliant!
ReplyDeleteNo Caroline, you can join in and use any products you like - paints, inks, markers are fine. Can't wait to see your project and welcome to We Love 2 Create
DeleteClaire xx
Ohh this ladies are fascinating! They look very pretty and interesting all the materials you used.
ReplyDeleteWonderful inspirations, seriously you guys kick it! Many thanks for another great challenge and for all the hard work you put in Karen x
ReplyDeleteHello. Thank you for hosting this challenge. Beautiful projects.
ReplyDeleteFabulous inspiration from the team as always. Looking forward to hopping round for a closer look.
ReplyDeleteAlison x